Friday, April 27, 2012

FROG Gloster Meteor Mk.IV

There's a much bigger story around this FROG 1/72 scale Gloster Meteor Mk. IV than just having built it when I was eleven years old. The bigger story is, I got to spend time with a real Meteor at Mojave Airport. It was owned by Al Letcher, and was actually an Armstrong Whitworth N.F. 11, later converted to a TT-20 target tow vehicle. Al also owned a DeHavilland Vampire Mk. III, and at the time (1976) they were the oldest two jet aircraft flying in the United States. I came to know Al because my Mom got a job as his secretary at The Letcher Mint in Lancaster. Al minted tokens for Las Vegas and Reno casinos, and also commemorative coins for the collector's market. His desire back in those days was to own and operate a Royal Air Force museum there at Mojave. He got off to a pretty good start with the Vampire and Meteor, and later a Hawker Hunter! But by the mid 1980s his interest wandered to helicopters, and all three jets were eventually sold. The Meteor now sits in a museum at Edwards AFB. But for those few glorious years in the late seventies, Al's Meteor graced the skies over the Antelope Valley. It was even used in the WONDER WOMAN T.V. series episode, "The Feminine Mystique" guised as America's new secret weapon, the 'XPJ-1'.

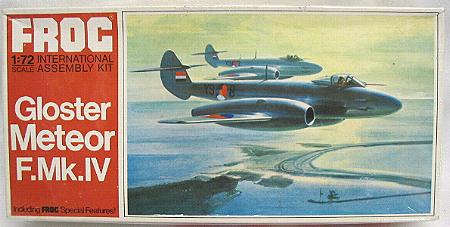
As I mentioned in my post about the Grumman HU-16E Albatross, Mojave Airport was a magical place for a plane-crazy kid like me. Al's own aircraft made the place even more exciting. Al would let me sit in the cockpits of the Meteor and the Vampire, and that was a real privilege. He even let me scrub the underside of the Meteor with kerosene! How many 11-year old kids get to do that? I treasure the memories of Al and his wife Ada; they were like family to me. Al knew I liked to build model airplanes so he gave me a FROG Meteor MK. IV kit along with a FROG Vampire FB.5. I remember him telling me there weren't any models available of the exact variations of his Meteor and Vampire, and that the two FROG kits were about as close as one could get. I didn't care, they were model airplanes and I was thrilled to receive them and put them together. They were prized items in my collection, and I even refurbished the Meteor when I was in High School. I gave it a coat of silver with my airbrush, and put some new decals on it.
My rebuild pictured here was a bagged kit I found at a model swap meet in Missouri, but I later found an empty box for it on EBay. The kit was missing the display stand and the pitot tube, but that was okay. I knew I was going to build it wheels-down and the pitot tube would easily be replaceable with either plastic or brass wire. It was fun to build again, and easy to paint since the whole thing is silver. The original decals were thick, but went on fine. I love having this model back on the shelf. It meant a lot to me to as a kid, and still does today.
I should mention also that Matchbox eventually came out with an A.W. Meteor NF in 1/72 scale as well as Classic Airframes, who released a beautiful but dreadfully expensive Meteor NF in 1/48 scale. In 2006 I built a Matchbox Meteor to look like the XPJ-1 from WONDER WOMAN. I put it up for auction on EBay as a one-of-a-kind collector's item, but it didn't generate many bids. I might do another one later to match Al's white 'Mojave Meteor' from days gone past. Al painted the meteor gloss white, and put RAF roundels on it. He knew this wasn't historically accurate, but was more concerned about keeping the aircraft cool since it was kept outdoors in the hot desert sun.

Tuesday, April 17, 2012

Airfix 1/72 USAF F-86D Sabre "Dog"

Sometime in 1976 I sat down at my Dad's workbench in the garage, and with Paul McCartney & Wing's "Let 'em In" on the radio, I started work on my second Airfix model kit, the F-86D Sabre. I remember being impressed with the quality of this model; the parts seemed to fit better than most kits I had built up to that time. I hand-painted a few parts such as the radome and anti-glare panel, but left the rest in the natural silver-gray plastic.
When it came to rebuilding this kit 36 years later, I knew it had to be shinier than the dull plastic color. I wanted it to look like the one on the box art, so I sprayed it with Testors chrome; which in my opinion is the poor-man's version of Liqua-Plate or some such other esoteric hobby product intended to replicate bare aluminum. I think it looks good and somewhat vintage-like. After all, if one really wanted to stay within this kit's original context, that is, an English kid in 1975 would have brush painted it with Airfix or Humbrol silver, it would look a lot like my rebuild pictured below.
I really enjoyed building this model again, as I have with most of the others. Maybe it's because my memories of doing so the first time are still so vivid. One thing I did differently the second time was to build it 'gear up' like the one on the box top. One reason for this is the nose wheel piece is famous for its weak strut, which breaks very easily. I remember my original breaking several times right where the nose wheel forms with the compression cylinder. I say this is "famous" because it's mentioned in the review of this model in a 1976 issue of SCALE MODELER magazine. Another reason is I like the way the Sabre looks in flight mode with the wing tanks. So why not forget the gear this time? I know there are modelers out there who absolutely have to have a wheels-down model every time. But for me, it's nice not to have mess with the extra assembly and painting every now and then.
This is one of my favorite Airfix kits because it was still pretty new when I bought it the first time, and is an excellent quality kit. This rebuild may not be the last time I'll build one of these.  

Thursday, April 12, 2012

Hasegawa's Classic 1/72 F-104J

The 1/72 scale Lockheed F-104J is the first model kit by Hasegawa I ever built. I bought it at Peterson's on a shopping trip with my friend Phil. I remember painting a few details on it such as the white wing tops and black anti-glare panel, but that was about it. It remained in my collection up until we moved from J-5.
Building this kit again was fun, but I was surprised at the low quality of the parts. The F-104J must have been one of Hasegawa's early airplane kits because the parts do not fit well, and the plastic is molded in a hard, brittle, silver-gray. There was a fair amount of flash on some parts. At some point in the early 70s Hasegawa must have had a quality improvement initiative, because other kits such as the A-4E Skyhawk (post forthcoming) are like night and day compared to this one.
For this rebuild I chose the Japan Air Self Defense Force version "666", same as my original. Instead of leaving the fuselage bare plastic though, I sprayed it with Testors primer gray, which seemed to match the Federal Standard shade of gray recommended on the instruction sheet. For the shiny aluminum part around the tail pipe, and the canopy framework I used metal foil with Micro Metal Foil Adhesive. I chose to omit the under wing fuel tanks and Sidewinder missiles in order to keep the Starfighter's sleek appearance. I don't think Hasegawa ever released an airplane model kit with a display stand, so wheels down is always the "option" unless one wishes to hang their kit from the ceiling.
This is an okay kit, not my favorite, but it was fun to revisit. I'm looking forward to rebuilding Hasegawa's better kits such as the A-4E, Mig-25, and Thunderbirds T-38.

Monday, March 26, 2012

Monogram Douglas TBD-1 Devastator

The Monogram 1/48 scale TBD-1 Devastator was the most advanced model kit I built during my early days on J-5. I remember buying it at Peterson's; my friend Phil was with me, and he pointed it out. Phil was a more experienced modeler than I was, and he liked large kits with lots of detail. I on the other hand had bought mostly reissues of older kits from the 50s and 60s. On the day I got the Devastator, Phil got a Hasegawa 1/32 Boeing P-26 Peashooter. We took our kits home and starting building immediately. Phil let me use some of his paints, and I put the TBD together fairly well. It was one of my pride & joy kits on the shelf.
Monogram released the TBD kit in 1974. It was a time of renewal for Monogram; they hit a low spot in quality in 1970, and came back in 1973 with their 1/72nd scale F-82 Twin Mustang. In '74 they released a 1/72 F-15A Eagle, and three 1/48 scale WWII airplanes: P-61 Black Widow, Do-335 Arrow, and TBD-1 Devastator - all fine kits. There were two versions of the TBD-1 released within a short period of each other. The original release in 1974 was packaged in a "tall box" and included a black & white pamphlet on building dioramas by Shep Paine. It shows a crashed TBD in the water during the battle of Midway. Later editions were packaged in a "short box" and did not include the diorama sheet. On the short box version, the nice color picture panels of the factory model on the box sides are cropped on the top and bottom, and part of the lithography on the box top is rearranged. I got the original 1974 version at Peterson's, and for my rebuild, I found a sealed one on EBay. There are however tons of later "short box" versions up for auction.
When I started on this rebuild, I took each step very slowly, and painted each piece as I went along. This was a more time-consuming method of construction, but it reduced some problems such as over-spray and touch up during final assembly and painting. I chose to make the pre-war version with silver fuselage and yellow wings & tail. I used Tamiya spray yellow, which is a fine product, but it's a little thinner than Testors, and did not cover the ribs on the wings very well. About seven coats were required to get it acceptable. Because the kit was still factory sealed, I expected the decals to be like new as well. Just the opposite was the case - they were dried-up and almost completely unusable. I was extremely disappointed; all the other vintage Monogram kits I had rebuilt up to this point had decals that gave me no trouble. I didn't want to have to buy another TBD kit in hopes of getting a good decal sheet, so I soldiered on with the originals using two thick coats of Micro Decal Film, Micro Set, and Micro Sol. A lot of TLC was needed to apply each decal, especially those on the wings which had to conform over the ribbing. After the decals dried, I coated them when Testors clear acrylic, and Micro Coat Gloss. It took almost as long to put the decals on this model as it did to assemble it- about a month all together.

Tuesday, March 6, 2012

Hawk SNJ

Here's the other kit I got at the dime store in La Mirada back in the summer of '76: the Hawk 1/72 scale U.S. Navy North American SNJ trainer. What a nice little kit for its time. In an era where manufacturers were cranking out toy-like plastic model kits that could be slapped together in an afternoon, Hawk went the extra mile to create an accurate, finely detailed kit of this famous airplane. They made it in two versions, the Navy SNJ you see here, and a USAF T-6 Texan. It has recessed panel lines and fine, flush-rivet detail. The only exception is the cockpit interior, which has two slightly over sized ape-looking pilots. This kit has been around since the late 1950s, and is still available by Testors. That first SNJ I got in La Mirada was molded in thick, white plastic. Navy SNJs were painted gloss yellow as illustrated on the box cover, but I chose to leave it white, either because Steven didn't have any yellow paint, or I just wanted to finish it in a hurry.
When I was searching for Hawk SNJ kits on EBay to rebuild, I noticed they were molded in different color combinations including white, orange, and yellow with black wing! I took a chance and got a factory sealed one, and upon opening it, I was pleased to find I had gotten an all-yellow molded version. The natural yellow of the plastic however was a little too dark, so I was going to have to spray it a lighter shade of yellow to match the Navy's. At least I wasn't going to have to paint black plastic with multiple coats of primer and yellow! And so it came to pass, I built the kit in a day, and sprayed it with Tamiya gloss yellow. The decals were still usable, but they were very thick. I knew this was going to be a problem with the black anti-glare panel piece. On its own, it didn't want to conform to the curvature of the nose section, and the cowling. On top of that, there are two steps forward of the front windshield which the decal has to conform to. Copious dousings of Micro-Sol along with some small incisions with an X-Acto knife were necessary to get this decal piece to properly adhere. It worked well in the end, and prevented me from having to paint this panel black instead (I like to use the original decals whenever possible.)
The hawk SNJ looks great in yellow, the way she's supposed to look. I might build the T-6 version as a companion to her some day. They'd make a great pair!

Wednesday, February 29, 2012

Aurora Huey Cobra

I wish I could remember what order I built my model airplanes starting in 1974; I can however pin two of them to the summer of '76 because I built them at the house of Manny & Virginia Ybarra, good friends of ours who lived in La Mirada, California. I spent a week there that summer and mostly remember the kid who lived in the house behind them, and going to see "Logan's Run" at the theater. The boy's name was Steven, he was a year or two older than me, and he liked to build model airplanes too. We must have been bored one day, so Virginia gave me a couple bucks to buy a model kit at the dime store across Leffingwell Rd. Leffingwell is an extremely busy four-lane city road, and was difficult to cross even back then (you can see our trek below.) We made it though, and I bought two kits: an Aurora AH-1 Huey Cobra, and a Hawk SNJ. I don't remember what Steven got, but this little dime store had all the Aurora helicopter kits from the 1970s including the now very rare Lockheed Cheyenne. I wish I had gotten them all, but the Cobra was the only Aurora chopper kit I built from the series.
When we got back to Virginia's house, we started building immediately. I didn't bring any paints with me, but Steven brought over his, and I painted the Cobra minimally, mostly just a few interior details, and the rotor blades. It looked pretty good because Aurora, thankfully molded the kit in a matte olive drab color. On the rebuild you see pictured here, I again painted only a few details. All the instruction sheet says is to paint the model in accordance with the box art. Now that's not very helpful! But many model companies such as Aurora, Lindberg, and Hawk, did this; it's as if the model engineers couldn't be bothered with painting guides or instructions. Revell and Monogram were much better at this. Lack of painting guidance aside however, the Aurora Huey Cobra is a nicely scaled and molded model kit. You can see that by the late 1960s, Aurora was making an effort to get away from toy-like models to more accurate ones for serious hobbyists. I don't know how it compares to the other choppers in the line such as the Jolly Green Giant, Cheyenne, Huey, and Sky Crane. I have seen the Chinook, and it hearkens back to Aurora's earlier toy-like days, probably because it's an earlier kit than the other helos.
I enjoyed building the Huey Cobra again; it looks almost exactly like my original! It brings back good memories of that summer in La Mirada, hanging out with another kid who appreciated models - something a guy my age now sorely misses. By the way, before I left Virginia's house to go back home, Steven gave me his unpainted Monogram 1/48 DeHavilland Mosquito! I painted it when I got home, and it was a treasured addition to my collection for some time afterwards.

Tuesday, February 21, 2012

Aurora Snaparoos! Weeeeeeeeeeeeee!


My blog would not be complete without mentioning the Aurora Snaparoos set of four jet airliners. Gemco had all the different Snaparoo sets, but I remember the only one I was interested in was the airliner set, because it had a Fairchild F-27. These little kits are similar to what a kid would get in a cereal box - simple little models where you could twist the pieces off the runners, and snap together in a matter of minutes. The box shows the four little airplanes nicely painted; even the F-27 looks like it's in Hughes Airwest livery. No decals are included however, and painting these things would really be a pain if one tried. I found a factory sealed box of these on EBay, and opened it up to relive the good memories. I believe I got the Snaparoo jet airliner set originally in the summer of 1975. The box shown here is dated 1975, so they had probably just come out when I got mine that summer. The Snaparoos are one of Aurora's last model kit products; the company would be out of business the following year.
It would be fun to put these together again after 37 years, but I just can't. I'd rather leave them in their individual packages. The box is in such great condition too, fresh and bran-new looking. I'll just leave the box on display with the rest of the built kits.