
I've mentioned several times throughout this blog that I rarely saved enough money when I was a kid to buy the more expensive, challenging model airplane kits. The Williams Bros. C-46 is an exception. I wanted it badly in 1977, and one day that year I finally had enough cash to plunk down and get it. I was still in my pre-airbrush, fine-finishing days, and that first C-46 looked, well, not so good. I used Testors silver to make the all-metal 1944 version and it had lots of streaks. That plus the some of the advanced construction requirements such as having to cut out the landing gear doors from the main lower wing half piece was a bit past my skill level. But, it was a prized model in my collection for years afterwards.
For this rebuild, I chose to do the early U.S. Army Air Corps version. In fact, the decals provided for this version by Williams Bros. replicate the first C-46 delivered to the Army in 1942. I'm a sucker for early versions of airplanes because they represent an original idea, and often look much cleaner over later versions which tend to have more stuff having from them such as antennae, bulbous radomes, and gangly weapons pods. To do this for the C-46 model, one has to scrape off the stiffeners on the rear fuselage below the vertical stabilizer. The easy parts however are the navigation dome on top of the fuselage can be ignored, antennae are at a bare minimum, and you don't have to drill out the gun ports on the side windows.
I came close to airbrushing this model because Testors does not make Neutral Gray in a spray can. I did however find some made by Tamiya. So I sprayed the underside with the Tamiya Neutral Gray, then masked the lower surface with paper cut to shape, and raised ever so slightly from the model surface with yellow tack tape, then sprayed Testors Olive Drab on top surfaces. The result is as good as I could have done with an airbrush. I only had to clean up a few spots of O.D. overspray. The brilliant thing was, the Tamiya gray is a lacquer, so a Q-Tip lightly soaked in enamel thinner cleanly wiped away the O.D. without affecting the gray one bit.
When set next to the other Williams Bros. kits such as the Boeing 247 and the B-10, one quickly realizes what a huge airplane the C-46 really is. I remember seeing the one on display at the Pima County Air Museum in Tucson, Arizona for the first time. When I walked into the hangar, I was immediately stuck by the huge size of the Commando. I'm glad to have this large scale model back on display in my collection.


 I've mentioned several times throughout this blog that I rarely saved enough money when I was a kid to buy the more expensive, challenging model airplane kits. The Williams Bros. C-46 is an exception. I wanted it badly in 1977, and one day that year I finally had enough cash to plunk down and get it. I was still in my pre-airbrush, fine-finishing days, and that first C-46 looked, well, not so good. I used Testors silver to make the all-metal 1944 version and it had lots of streaks. That plus the some of the advanced construction requirements such as having to cut out the landing gear doors from the main lower wing half piece was a bit past my skill level. But, it was a prized model in my collection for years afterwards.
 When I bought the Williams Bros. 1/72 scale Northrop Gamma sometime back in 1977, my modeling skills had finally developed to the point I could successfully tackle such an advanced kit. After all, I'd had over fifty models under my belt by then, maybe more. I remember building the Texaco Sky Chief Phase II version, like the painting on the box top. I chose the same version to rebuild, because it requires the least modifications to the parts. The major one is cutting out the rectangles for the windows in the fuselage sides. Other than that, the kit is pretty much straight forward. My original one was hand-painted with Testors silver, complete with streaks and fingerprints. For this rebuild, I sprayed it with Testors Aluminum buffing metalizer from a can. Then I power-buffed it with a Dremel tool with cloth polishing wheel. Like the Boeing 247 I did earlier, it took a lot of buffing to get the shine. I had to recharge my Dremel's battery more than once. It's one of those things where you just want to keep on buffing because you think you're going to get a better shine. But I think I got the best I could get. The original Microscale decals went on perfectly using the Micro system. A local I.P.M.S. collector's show was coming up at the Evergreen Aviation Museum, so I decided to enter the Gamma in the "Civil/Sport, etc." category. I won third place! I really like this little kit, and I'm looking forward to completing my Williams Bros. collection with the C-46 Commando, which should be the next entry on this blog.
 I'm on a bit of a Williams Bros. kick right now; in fact right after I finished this Martin B-10B I started on the 1/72 scale Northrop Gamma. I never had the B-10B as a kid, but I remember seeing it at Peterson Hobbies. I was never really interested in the airplane - it looked kind of ugly to me. But I picked this one up a year ago at a model swap meet at the Evergreen Aviation Museum in McMinnville, Oregon for ten bucks. I figured if I ever got around to building it fine; if not, I'd re-sell it. But after building and making-over the challenging Boeing 247, it seemed to me this B-10B would also be a fun challenge. I really like these old Williams Bros. 1/72 scale airplanes because they are for skilled craftsmen who know how to manipulate styrene plastic. You have to do a fair amount of cutting, scribing, chopping, and scratch-building to get the desired result. Plus, the Williams Bros. give you several options of aircraft versions to choose from. For this B-10B, you get to choose from the first USAAC gloss olive drab & chrome yellow scheme, to the middle cobalt blue/chrome yellow version, or the late 30s, early 40s silver-metallic painted scheme. I chose the middle one because I like the glossy blue/yellow contrast. It was easy to do as well because the fuselage parts are already moulded in the correct color, except for the vertical fin, which must be masked off and painted yellow. I already had a bottle of Testors gloss French Blue enamel, which is very close to Cobalt Blue, so I brush painted it on the fuselage and engine nacelles. You can't even see any streaks - it went on beautifully! Testors does not make chrome yellow in a spray can, so I used regular yellow, which is darn close too. The wings are moulded in what appears to be a chrome type yellow, but the plastic was too thin and translucent, so I sprayed them with Testors white primer, then the gloss yellow. The original decals went on beautifully. Interestingly, the Williams Bros. recommend in the instructions using thin colored chart tape for the canopy and blister framework. I had a roll of Pactra blue racing trim tape, so I though I'd give that a try in order to abide by Williams' recommendation. The color of the tape matched the Testors French Blue perfectly, and it looks great. It took a little longer to do than painting, but was worth the effort.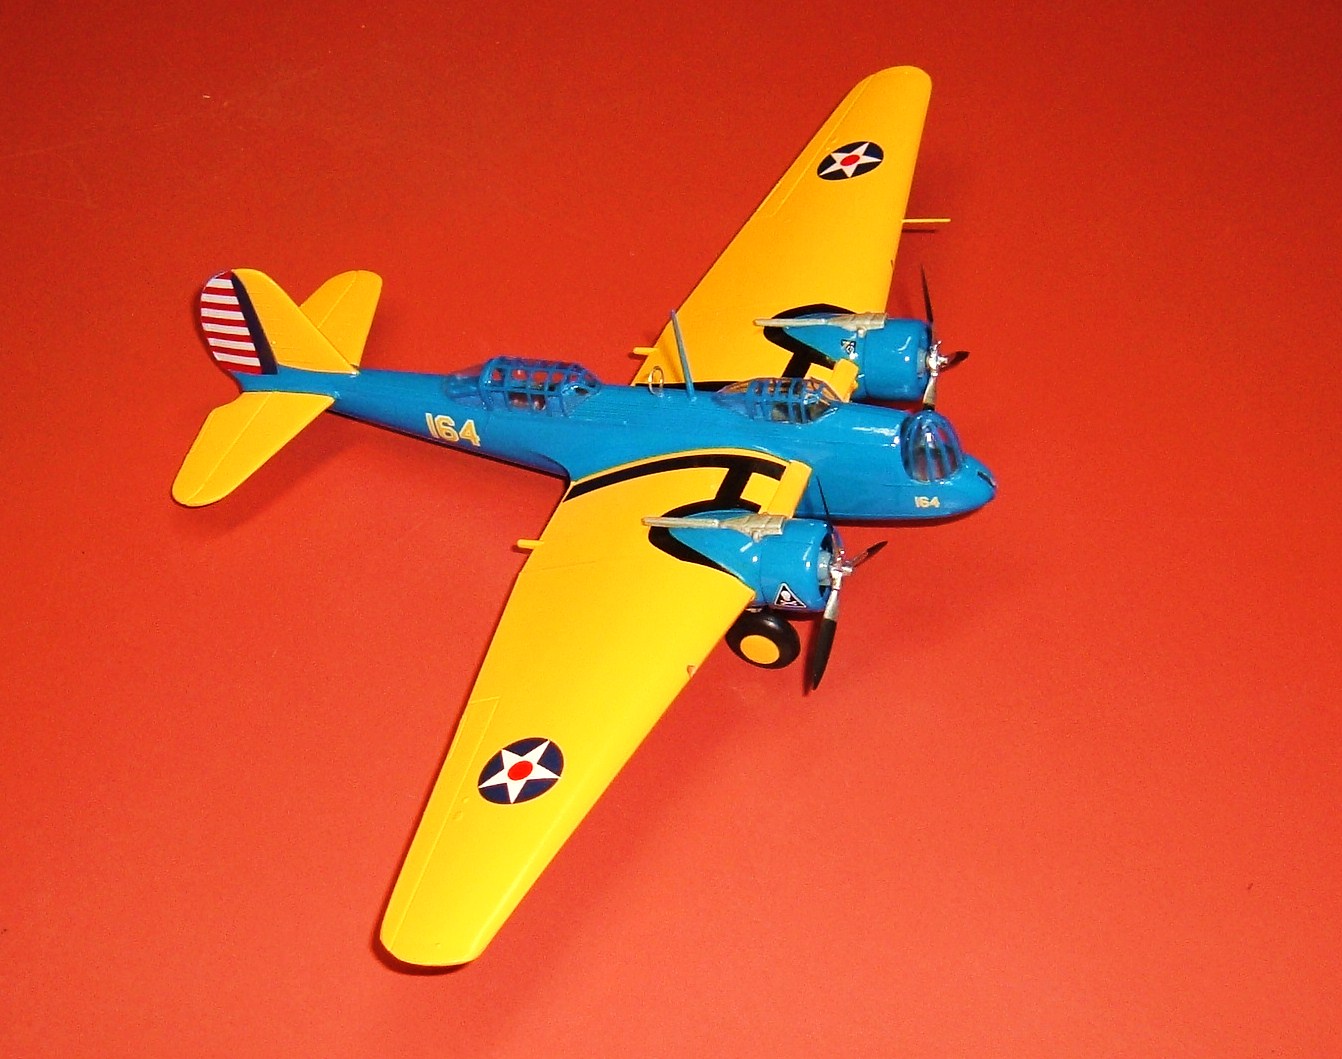

 Entex used Nitto moulds for their North Central/C-47 version marketed here in the U.S. It's very accurate in shape, but some of the pieces had a surprising amount of flash. From at least a foot away, this little DC-3 looks real nice - better than Monogram's more toy-looking DC-3 from the 1950s.


